Red Velvet Cheesecake Bundt Dump Cake

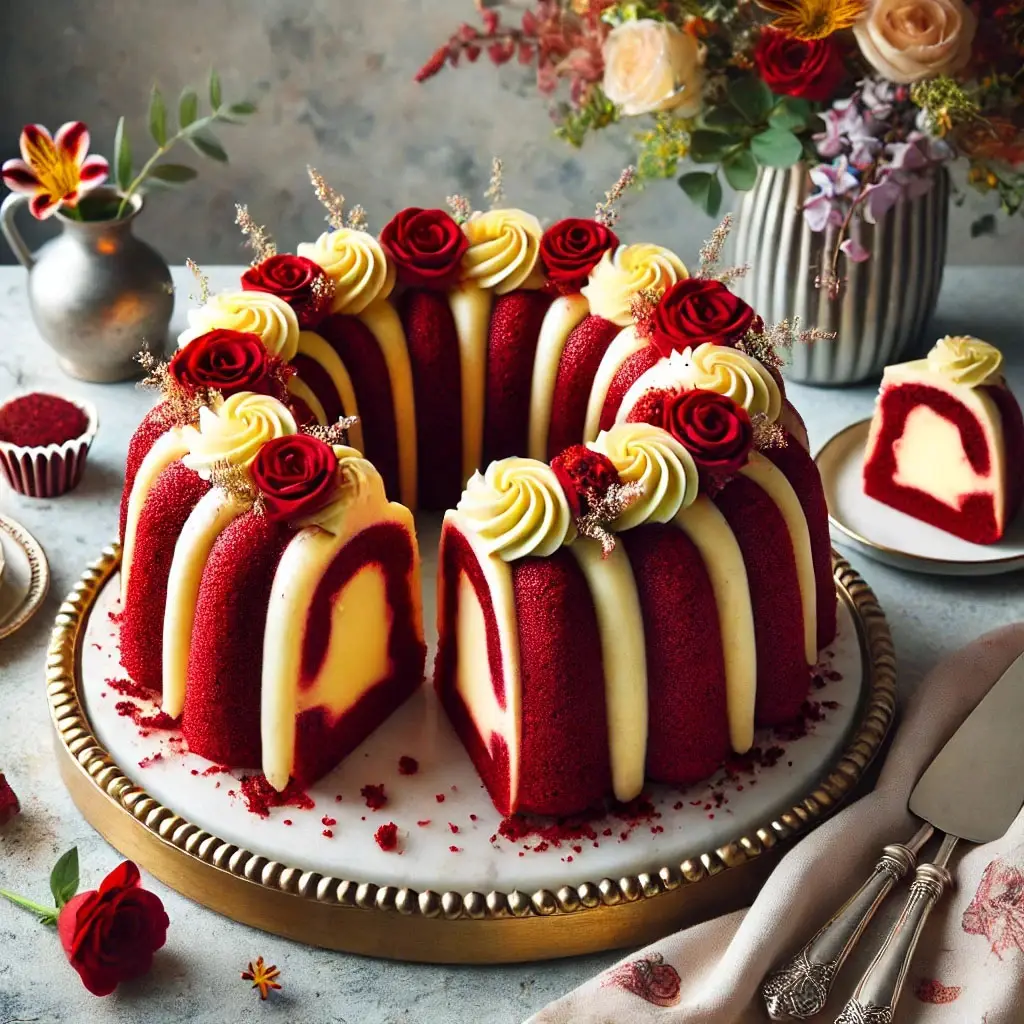
Welcome, my fellow dessert divas! Today, I present to you the pièce de résistance of lazy baking: the Red Velvet Cheesecake Bundt Dump Cake. Yes, you heard that right—dump cake. But don’t let the name fool you. This beauty is anything but basic. Picture this: red velvet cake and creamy cheesecake swirling together in perfect harmony, all in a glorious bundt shape.
I first stumbled upon this magical creation during a frantic midnight snack search. You know, one of those “I’m only having a bite” moments that turns into devouring half the cake. My kitchen looked like a tornado hit a bakery, but it was worth every delicious crumb.
This recipe is so simple that even your most kitchen-challenged friend can nail it. No fancy mixers or culinary degrees required. Just dump, mix, bake, and voila! You’ve got yourself a dessert that screams gourmet with a side of sass. So, grab your ingredients and let’s get baking—you’re just a few steps away from dessert nirvana.

Red Velvet Cheesecake Bundt Dump Cake
Equipment
- 1 Bundt pan
- 1 whisk or hand mixer optional
Ingredients
- 1 box red velvet cake mix
- 1 14-oounce can sweetened condensed milk
- 1/2 cup unsalted butter melted
- 3 large eggs
- 1 8-ounce package cream cheese softened
- 1/2 cup granulated sugar
- 1 teaspoon vanilla extract
Instructions
- Preheat your oven to 350°F (175°C).
- Grease and flour a bundt cake pan.
- In a large bowl, mix the cake mix, sweetened condensed milk, melted butter, and eggs until well combined.
- In a separate bowl, beat the cream cheese, sugar, and vanilla extract until smooth.
- Pour half of the cake batter into the prepared bundt pan.
- Spoon the cream cheese mixture evenly over the batter.
- Pour the remaining batter over the cream cheese layer.
- Bake for 50-55 minutes or until a toothpick inserted into the center comes out clean.
- Allow the cake to cool in the pan for about 15 minutes before turning it out onto a wire rack to cool completely.
Notes
Nutrition
Recent Posts
Recipe Archives
Dump Cake Categories
- Adults-Only Dump Cakes
- Blog
- Breakfast Dump Cakes
- Bundt Dump Cakes
- Chocolate Lovers Dump Cakes
- Donut Dump Cakes
- Dump Cakes for Special Diets
- Dump Cakes for Special Occasions
- Elevated Dump Cakes
- Featured Article
- Frozen Dump Cakes
- Fruit Dump Cakes
- Gourmet Dump Cakes
- Holiday Dump Cakes
- International Dump Cakes
- Kid-Friendly Dump Cakes
- Mini Dump Cakes
- No-Bake Dump Cakes
- Pie-Flavored Dump Cakes
- Quick Dump Cakes
- Snack Attack Dump Cakes
- Uncategorized
- Unconventional Dump Cake Baking
Diva's Finishing Flourishes
Add White Chocolate Chips:
Fold in 1 cup of white chocolate chips into the batter for added sweetness.
Include Cocoa Powder:
Add 2 tablespoons of cocoa powder to the cream cheese mixture for a chocolatey surprise.
Top with Cream Cheese Frosting:
Drizzle homemade cream cheese frosting over the cooled cake and garnish with red velvet cake crumbs.
Presentation Suggestions:
Red Velvet Royalty:
Place your cake on a red velvet cake stand (if you have one) or a white plate to make the red pop. Drizzle the cream cheese frosting over the top like you’re creating modern art. Present with a flourish, saying, “This? Oh, just my usual Wednesday night bake.”
Cheesecake Charm:
Add a few red velvet crumbs on top for decoration. Serve each slice with a side of berries and a mint leaf. As you serve, declare, “I call this my pièce de résistance.”
Velvet & Glam:
Dust a bit of edible gold glitter over the cake for a touch of glam. Serve with champagne glasses filled with sparkling water and a slice of lemon. When your guests take a bite, simply smile and say, “Diva’s got to have her bling.”
Ready to wow your friends and family with this effortless slice of heaven? Whip up this Red Velvet Cheesecake Bundt Dump Cake today and watch their jaws drop!
Trust me, darling, you’ll be the queen of the kitchen – no tiara required.
Get baking and let the compliments roll in!

Comments